Choosing the right Pe Bottle Blow Molding Masterbatch affects more than the bottle’s color. It can influence processing stability, appearance, and the consistency of finished containers. A masterbatch that performs well in one setup may behave differently when resin grades, equipment, or production speeds change. Small details matter.
A practical selection starts with the bottle’s purpose and the conditions on the production line. Consider the target color, opacity, dosage, carrier-resin compatibility, and how evenly the pigment disperses. Ask for technical data, recommended processing conditions, and sample material for trials. Then compare results under settings close to your actual production—not only under ideal laboratory conditions. Check for streaks, specks, uneven color, or changes in bottle strength. These visible clues can point to a deeper compatibility or dispersion issue.
Supplier guidance is useful, but it should be weighed against test results from your own process. A clear discussion about resin type, machine settings, and performance expectations helps prevent avoidable surprises. Still, no checklist removes every uncertainty; production can reveal details a small trial misses. That is worth remembering. The following seven tips explain how to evaluate key factors, ask more focused questions, and make a choice based on evidence rather than appearance alone. They are intended as a practical starting point, not a substitute for testing.
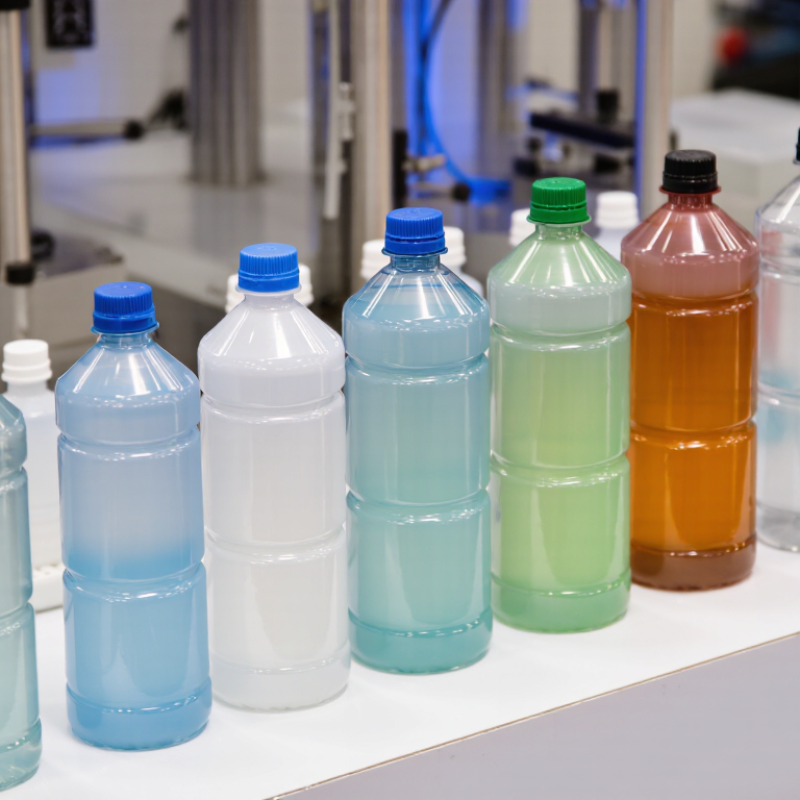
PE bottle blow molding masterbatch is a concentrated blend of pigment or functional additives and a polymer carrier. It is mixed into polyethylene during production to provide color or specific properties.
In the extruder, consistent dispersion helps produce bottles with even color and fewer visible specks. Compatibility matters. A carrier that does not suit the base resin can affect melt flow and parison stability, making bottle walls less consistent.
Selection depends on the bottle’s purpose and processing conditions. Check the recommended dosage, carrier type, heat stability, and suitability for the specific PE grade.
A vivid sample chip is useful, but it cannot show how color behaves in a thin handle or a curved shoulder. Small details count. Test the masterbatch on the actual blow molding line, then inspect wall thickness, surface appearance, and bottle strength.
Changes in pigment loading can alter processing, so adjust gradually. One honest limitation: a supplier’s data sheet cannot predict every result on your equipment. Record trial settings and compare samples under the same lighting.
Matching a masterbatch to polyethylene starts with the resin grade, not the color chip. HDPE, LDPE, and LLDPE differ in melt flow and melt strength. A carrier resin compatible with the base polymer can help reduce gels and uneven color. Check the recommended letdown range, then verify it with a small production trial. Small differences matter.
The blow molding machine matters just as much. Screw design, barrel temperature, and output rate affect how pigments and additives disperse. High shear may improve dispersion, but excess heat can dull some shades or increase deposits near the die. Watch the parison for streaks, weak spots, or changing wall thickness. These can indicate a poor flow match, though resin contamination or unstable temperatures can cause similar symptoms.
During trials, record the resin lot, dosage, melt temperature, cycle time, and bottle weight. Compare early bottles with those made after the line reaches steady state. Results may not transfer directly between machines, even when the resin is unchanged. A common mistake is adjusting dosage before checking the screen pack. That can waste material. Production notes are useful, but imperfect; operators may notice changes the log misses. Combine measured data with their observations, and change one variable at a time.
| Tip | What to Check | Match the Masterbatch To | Practical Selection Guidance | What to Verify in a Trial |
|---|---|---|---|---|
| 1 | Base resin type | The bottle-grade PE used in production, such as HDPE or LDPE | Choose a compatible PE carrier. A carrier from the same resin family is a sensible starting point; confirm suitability with the resin and masterbatch technical data. | Check for even color, stable extrusion, and no visible streaking or specks in the bottle wall. |
| 2 | Melt flow and processing behavior | The specific PE grade and the machine’s operating conditions | Compare melt-flow data only when the test method and conditions are the same. A large difference in flow behavior between carrier and base resin may affect mixing or parison stability. | Review parison formation, wall-thickness consistency, and melt stability at the intended production settings. |
| 3 | Blow-molding process and equipment | The production process, such as extrusion blow molding, and its screw, die, and dosing system | Tell the supplier whether the line uses continuous or accumulator-head extrusion and how the masterbatch is metered. Confirm that pellets feed consistently through the actual dosing equipment. | Look for reliable feeding and dosing, uniform color through the production run, and no buildup or deposits at the die. |
| 4 | Color strength and addition rate | The target shade, bottle size, wall thickness, and masterbatch concentration | Use the supplier’s recommended let-down range as a trial starting point, then adjust based on color measurement and visual approval. Do not assume one addition rate suits every resin grade or bottle design. | Compare color samples under consistent lighting and check representative bottles from the beginning, middle, and end of the run. |
| 5 | Pigment dispersion and filtration | The colorant system, screw-mixing capability, and any screen pack or filtration setup | Request evidence of dispersion quality and confirm that the formulation is appropriate for the equipment’s mixing and filtration conditions. Excessive filtration restriction can affect output and process stability. | Inspect for agglomerates, streaks, pressure changes, and screen-pack fouling during a production-representative trial. |
| 6 | Thermal and end-use requirements | The processing temperature profile and the bottle’s intended contents and use | Confirm that the colorants and additives are suitable for the processing conditions and applicable end-use requirements. For regulated packaging, obtain the relevant compliance documentation for the finished application. | Check color stability after processing and confirm that the finished bottle meets the applicable customer and regulatory specifications. |
| 7 | Mechanical performance and production consistency | The final bottle specification, recycled-content plan if applicable, and production controls | Test the selected masterbatch in the actual PE formulation. Colorant and additive levels can influence properties, so verify performance rather than relying on color approval alone. | Evaluate the required bottle tests, such as impact or drop performance, top-load, leak integrity, and dimensional consistency, as applicable to the package. |
Note: The guidance is general. Confirm resin-grade data, masterbatch recommendations, dosing settings, and finished-package requirements with the relevant suppliers and production trials.
7 Tips for Choosing PE Bottle Blow Molding Masterbatch
Evaluating Color, Dispersion, and Processing Performance
Color should be judged on a finished bottle, not a flat sample. Check the shoulder, handle area, and pinch-off for streaks or shade shifts. A plaque can look perfect, yet the bottle may disappoint. Small details matter. Ask for trial material made with your actual PE resin and let-down ratio. Keep lighting consistent when comparing samples.
Dispersion affects both appearance and performance. Inspect molded walls for specks, cloudy patches, and uneven opacity, especially in thin sections. PlasticsEurope’s Plastics – the Fast Facts 2023 reports that packaging represented 39.1% of European plastics-converter demand in 2022. That scale makes repeatable processing valuable, but it does not guarantee a specific masterbatch will run well. Check batch consistency and document sample results.
Processing trials should track melt flow, parison stability, cycle time, and bottle weight. ASTM D1238 provides a standard method for measuring melt mass-flow rate; compare results under the same test conditions. Confirm the color concentrate’s carrier suits the PE grade, then watch for pressure changes, buildup, or brittle pinch-offs during a sustained run. Test it hot. One short trial can miss problems that appear after several hours, so repeat the check across production lots. Real lines are imperfect, and the evaluation should allow for that.
Example evaluation scores for comparing color, dispersion, and processing performance.
Illustrative rubric scores on a 1–5 scale, not measured supplier or product data. Use consistent resin, let-down ratio, equipment, and test conditions when comparing samples.
Tip 1: Match the masterbatch carrier to the bottle resin, usually the specified PE grade. Poor compatibility can cause streaks, weak weld lines, or uneven color.
Tip 2: Check each additive’s purpose and dosage. UV stabilizers may suit outdoor bottles, while slip agents can affect labeling or decoration. Small details matter.
The OECD’s Global Plastics Outlook (2022) reports that packaging generated 40% of global plastic waste in 2019, making recyclability worth checking during material selection.
Ask suppliers for technical data, safety documentation, and declarations covering the intended use. For bottles that contact food or personal-care products, verify applicable market requirements and test the finished container where needed. A compliant ingredient list alone does not prove the final bottle performs as expected.
I would still question broad claims like “universally compatible”; resin, pigment, and additive combinations can behave differently on a production line.
Tip 3: Test the masterbatch in the actual bottle process. Check color consistency, melt behavior, impact strength, and wall-thickness distribution across the shoulder, body, and base.
Include the cap and label in application trials, too. A bright sample chip can look perfect, yet the bottle may show dull patches after blowing.
Record dosage, processing conditions, and results, then repeat the trial when resin or bottle geometry changes.
Choosing PE bottle blow molding masterbatch starts with testing the actual resin, color loading, and machine settings. Request a technical data sheet, then compare melt flow, moisture, and dispersion under the same conditions. Run a short trial on your production line, not only on a lab plaque. Look for streaks, specks, uneven color, and changes in bottle-wall thickness. Check the neck finish and drop performance too, since an attractive sample can still produce weak packaging. Keep settings recorded. Small differences matter. A test is useful only when the base resin and dosage match routine production.
Cost efficiency means more than price per kilogram. Calculate the letdown ratio, rejected bottles, purge material, cycle time, and extra cleaning. A lower-priced concentrate may need higher loading or create color variation that slows output. Ask suppliers for batch-to-batch consistency data, storage guidance, and clear troubleshooting support. Confirm that sample and production lots use comparable specifications. Response time matters. Try a modest order before committing to long supply schedules. Share your target shade, resin grade, output rate, and bottle use; vague requirements invite vague recommendations. I would still question any “perfect” test result: one successful run is evidence, not proof of reliability.
Start with the PE grade, such as HDPE, LDPE, or LLDPE. Choose a compatible carrier resin and check the recommended dosage. Small differences matter.
Screw design, barrel temperature, and output rate affect dispersion. Excess heat may dull color or cause deposits near the die.
Watch the parison for streaks, weak spots, and changing wall thickness. Resin contamination or unstable temperatures can cause similar signs, so don’t assume one cause.
Inspect the shoulder, handle area, and pinch-off under consistent lighting. A flat sample may look right, while the bottle shows shade shifts.
Look for specks, cloudy patches, and uneven opacity, especially in thin walls. Check batch consistency, too. One sample can be misleading.
Record resin lot, dosage, melt temperature, cycle time, and bottle weight. Compare early bottles with bottles made after the line stabilizes.
Match each additive to a clear need. UV stabilizers may suit outdoor bottles, while slip agents can affect labeling. Test the full application.
Request technical data and safety documents for the intended use. Test the actual bottle for color, impact strength, and wall thickness. Test it hot.
Repeat it when the resin, bottle shape, or production conditions change. A short run may miss buildup or other problems after several hours.
Choosing Pe Bottle Blow Molding Masterbatch involves more than selecting a color. Start by understanding how the concentrate works in polyethylene and how its carrier resin should match the PE grade used for the bottle. Check that it is compatible with the blow-molding equipment and processing conditions, since a good match can support stable production and consistent results.
Evaluate color accuracy, dispersion, and processing performance, including whether the masterbatch blends evenly without disrupting bottle formation. Consider any functional additives in relation to the bottle’s intended use, and confirm that the material meets applicable requirements for that application. Before committing to regular production, test samples under realistic conditions for appearance, quality, and consistency. Finally, compare overall cost efficiency—not just the purchase price—and assess the supplier’s reliability, technical support, and ability to maintain consistent supply.